Every artist’s work reflects their own unique character.
Overtly, through its design, style, and treatment of the subject matter, and subtly through their choice of medium and how they employ it.
As a metal artist, what you do with grinder in hand reflects your human character and establishes your metal art style.
However, as a beginner, the marks you make may be generic and fall short of fully conveying your artistic intention.
As you gain experience, your textural palette will expand, and your ability to innovate with any given abrasive will evolve to meet each new challenge.
You can bring your metal art to life and take your metal art grinding skills to the next level by learning how to grind metal using decorative metal grinding techniques.
Though each abrasive type and configuration has its characteristic mark-making scratch pattern, how you hold and move your grinder, the speed, rpm, and pressure you use, and how you combine its marks with textures from other abrasives are what will set your art apart.
This page details the myriad ways I use decorative grinding techniques to enhance my metal wall art.
And if you want help or direction learning how to grind steel for your metal art, I provide links to my online learning resources.
If you’re also interested in seeing my original decorative metal art in its finished form and reading about how to incorporate metal wall art into your interior or exterior living and workspaces, you can do that here.
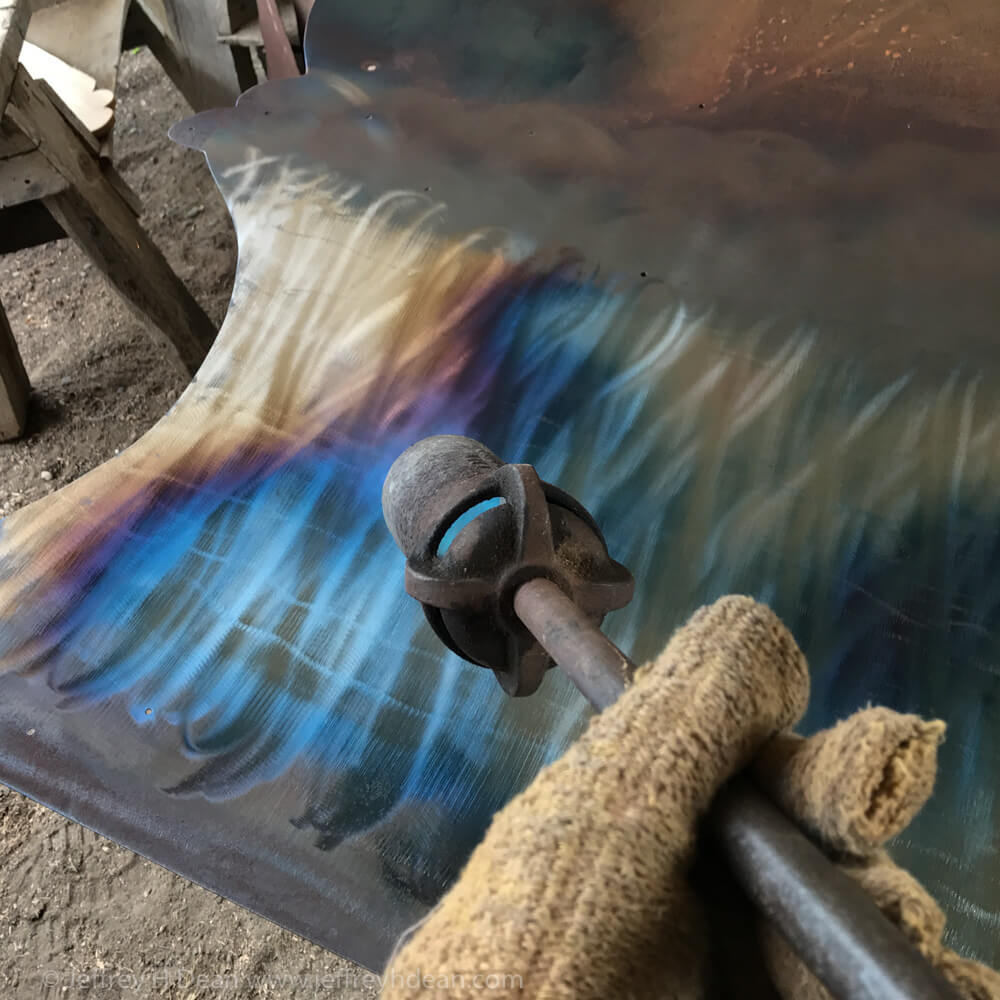
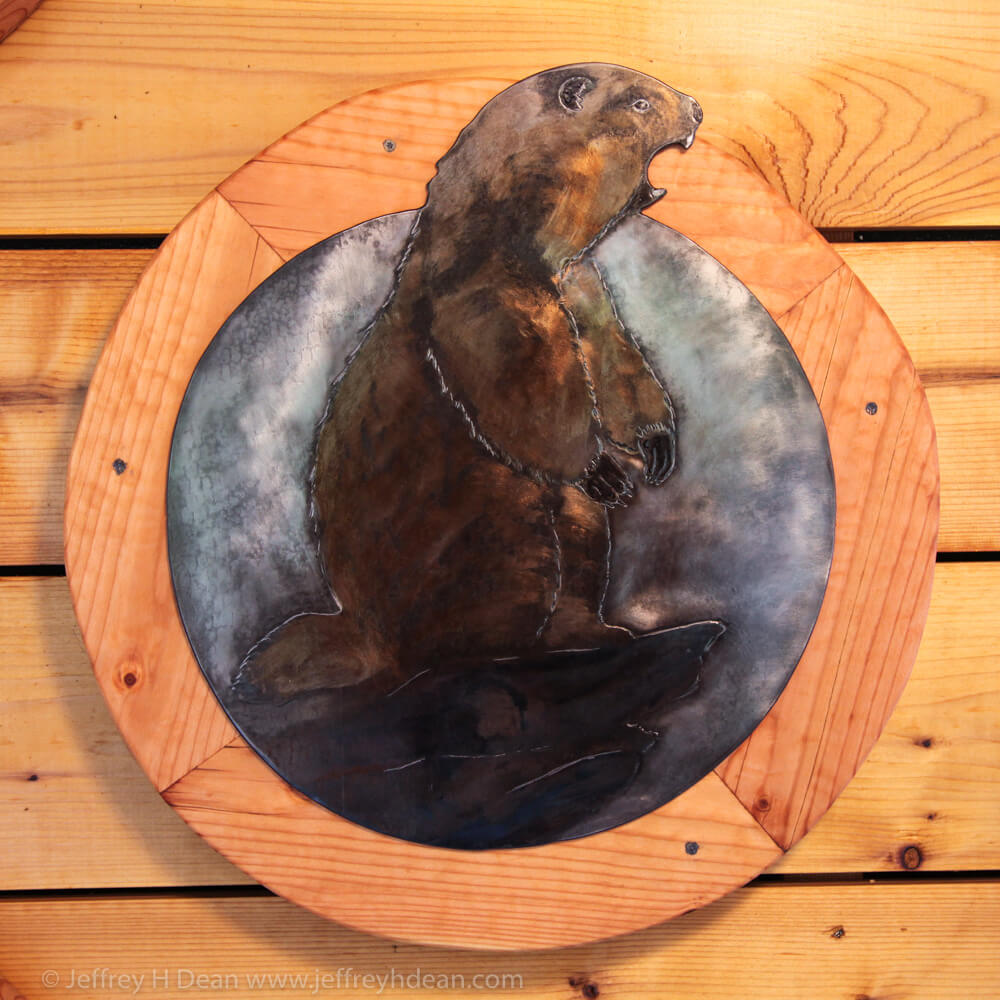
You can color a bare steel surface with heat colors, or for that matter, any patina designed for steel.
So why would a metal artist choose to use decorative grind patterns? After all, patinas and heat colors are beautiful in their own right.
In my experience, as beautiful as these colors are alone, the surface you apply them to makes all the difference in bringing them fully to life.
When you use sheet steel as your artistic canvas, metal grinding tools and abrasives are your pens, pencils, and paintbrushes.
In effect, you’re sketching with light as it reflects from each texture and decorative grinding pattern you create.
Therefore, your mastery of decorative metal grinding techniques will open the doors to a vast world of possibilities for expressing your artistic vision in steel.
Then when you combine these grind patterns with the colors from the heat color spectrum or another transparent patina, the only limit is your imagination.
Though engraving and grinding your design into steel before coloring it with a torch is similar to making a pencil sketch before painting a picture, there are a few distinct differences.
When painting, though there are some exceptions, the colors typically obscure your initial drawing.
However, with heat-colored metal art, the underlying scratch patterns you’ve made using rotary grinding tools directly influence the appearance of the transparent heat colors.
In addition, with much painting, you can add colors when and wherever you choose, irrespective of what colors you’ve already used.
This isn’t the case with heat-colored steel engraving, because you have to also heat the surrounding metal to evenly color the target area within it. In the process, the adjacent bare metal and lower temperature colors will also change color.
As a result, you can’t add colors in an isolated manner as you might with a paintbrush.
You must use specific metalworking techniques in order to place different temperature colors beside each other or to create sophisticated color blends.
Since the heat spreads through the entire piece of metal instead of being isolated locally, the heat color spectrum will radiate outwards from the heated area, altering any lower-temperature color or bare metal in its path.
This tendency makes heat coloring unique among patina methods.
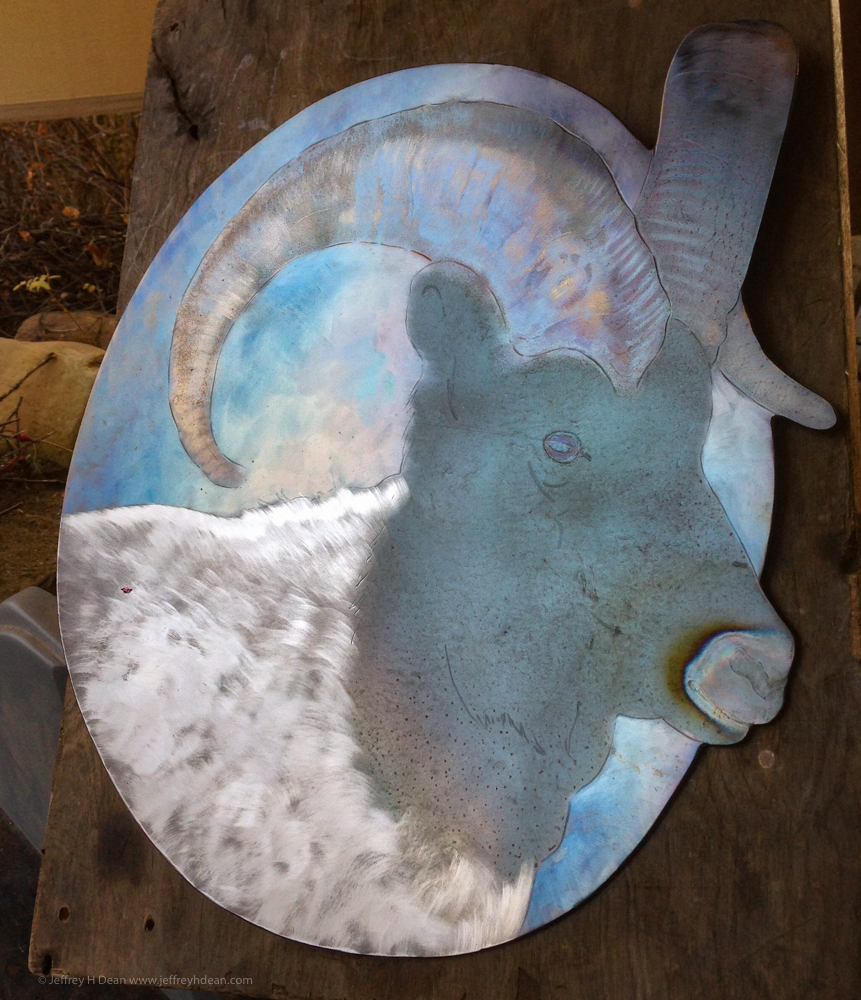
And one of the beautiful things about combining heat colors with surface metal grinding is the ability to specify precisely where your patina will be applied.
You create the equivalent of a digital mask by grinding the surface to bare metal in the desired shape or texture.
If you are deliberate about the sequential order of grinding and coloring, you can therefore isolate colors to areas of your choice.
But this also means you must be careful as you grind the surface for the following coloring sequence because if you over grind into a previously colored area, you can’t backtrack to re-apply a hotter color without affecting the lower-temperature colors around it.
In these cases, your grinder is your friend. The simplest way to eliminate these rogue colors is to use metal art grinding techniques to grind them back to bare metal in preparation for the desired heat color.
Just as you can convey the character of your subject matter with pencil and brush strokes, so can you suggest materials, motion, form, depth, transparency, and a wide range of other effects with metal grind patterns.
Your artistic style and the nature of your design will dictate whether you do so with precision or abandon.
You can see another example of grind pattern variations in the signature grind pattern palette of the artists at Modern Metal Art.
Our creativity wears many hats as artists, most notably as a vehicle for our inspiration.
Its vital role in the technical realm is just as important, providing insight and innovation to convey our artistic vision using whatever tools and materials we have at hand.
Simple metal grinding tools needn’t restrict our artistic output and given any toolset, we artists will typically find a way to create our artwork unhindered. Nonetheless, the nature and scale of the metal grinding tools we have at hand can dictate the work we do, or at a minimum, influence its character.
The broader our toolset, the more options we have for achieving the desired effect, and having the right tool for the job frees us to focus on our vision. Our creativity is challenged either way, whether by stretching the limits of a small toolset or choosing the most appropriate tool from a larger one.
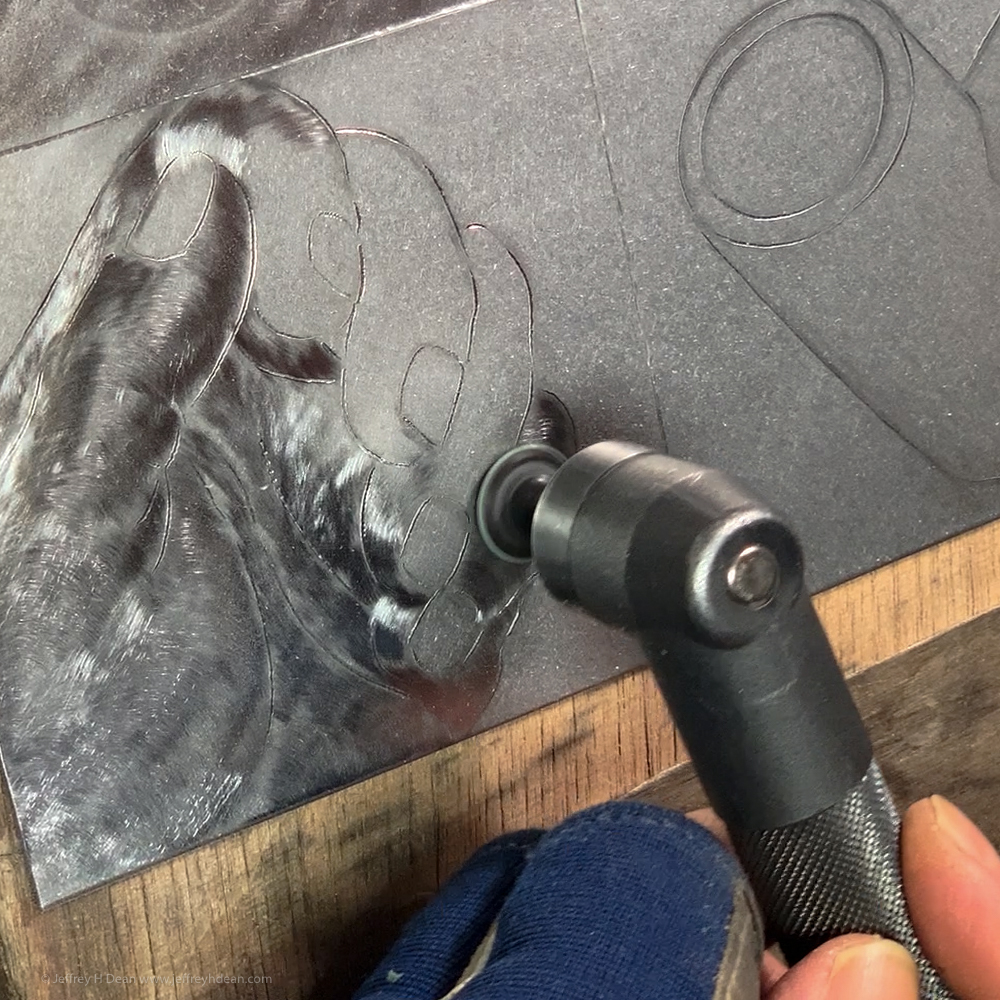
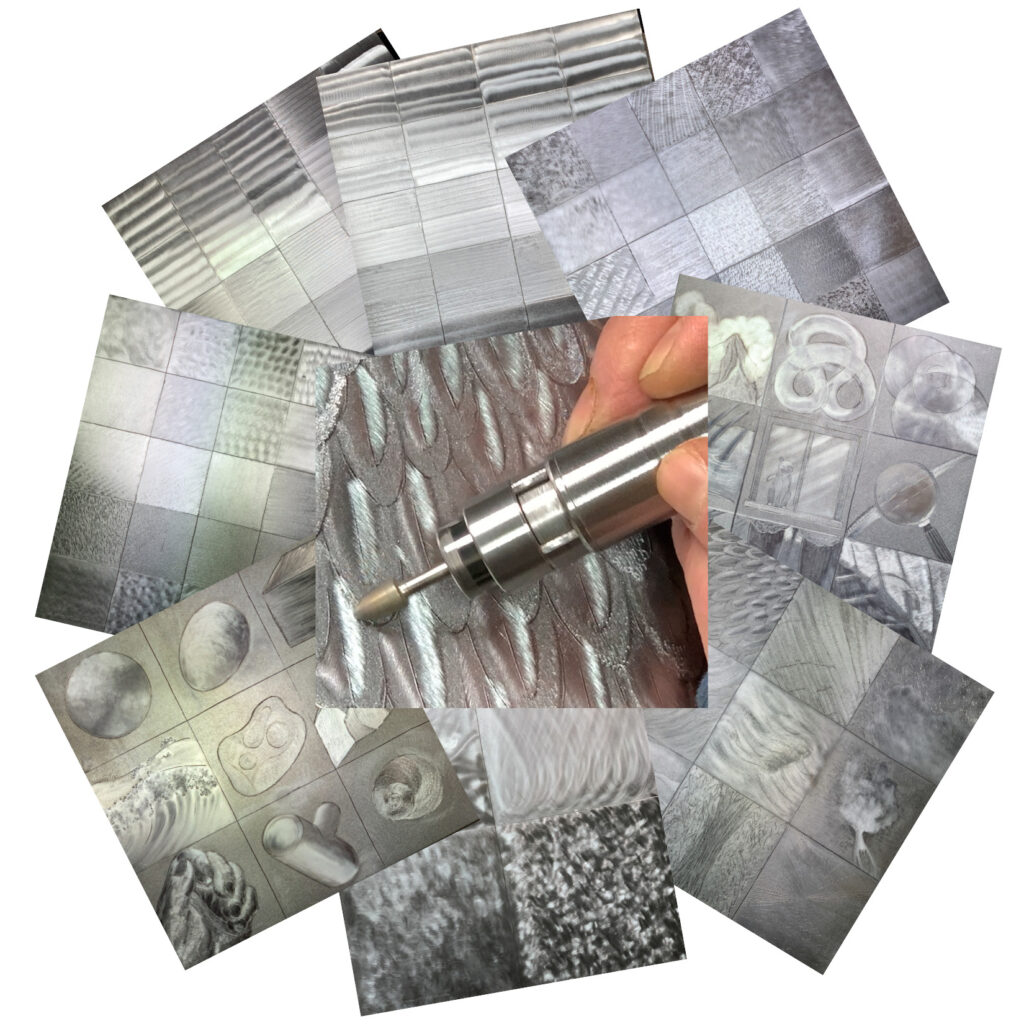
I do a lot of decorative grinding of metal to make my heat-colored steel engravings. Much of it is at low speeds, both for the effect and the control slower Rpm’s give me.
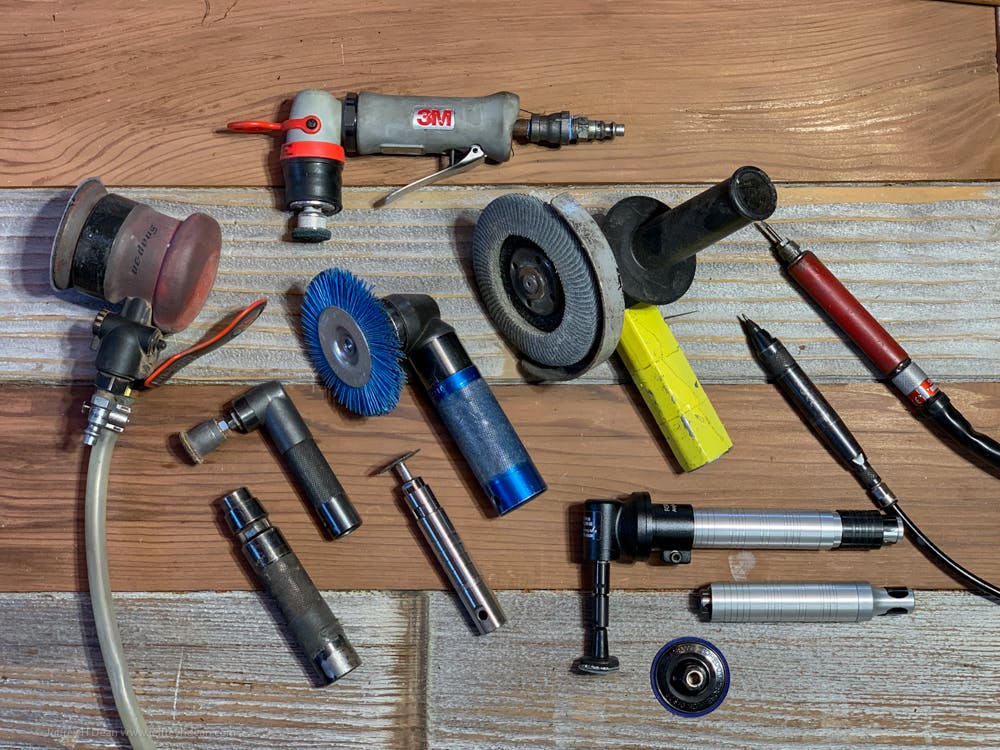
My favorite metal grinding tools are flexible shaft tools by Suhner and Foredom. I like the torque and speed range they provide and the lighter-weight handpieces compared to standard angle grinders and die grinders.
Most pneumatic grinding tools don’t provide enough torque at these low speeds. However, their light weight and portability make them excellent for lighter utility grinding.
I regularly use a pneumatic engraver and pencil grinder, as well as a couple of smaller pneumatic orbital sanders in my workflow.
When I started, I made all my engravings with a 1/6 HP Foredom SR motor and a straight handpiece. Later, I got a 4 1/2″ angle grinder, which I later replaced with Suhner flexible shaft tools. Also, a 1/3 HP Foredom motor with a heavy-duty square shaft.
I go into much more detail about my current tool choices and what I’d use if I were starting again in my Art of Heat Colored Steel Engraving course.
Module 1, Setting Up Shop, covers all aspects of optimizing your metal art studios for making heat-colored metal art.
I’ve also dedicated Module 4 entirely to the subtleties of decorative metal grinding.
This photo shows the Suhner handpieces I use the most, my pneumatic tools, and straight and right-angle Foredom handpieces.

If you aren’t familiar with the metal artist Nikos Bel-Jon, I encourage you to look up his work. I was totally unaware of him until I began researching metal artists who made pictures using surface textures.
Though he died fairly young in the 1960’s he was extremely prolific. His art ranges from representational to abstract. Each installation included carefully placed colored lights to bring his pieces to life.
From what I can tell, he did all his work by hand, without the aid of rotary tools.
He did much of his work on aluminum with his primary tool being only a wad of steel wool. On stainless steel, he used carborundum stones of varied shapes.
A meager tool budget is no longer a good excuse for not getting started : )
Looking at photos of him at work, you’ll notice him using a straight edge to mask adjacent surfaces when creating hard-edged patterns.
I’ve dedicated an entire module to the nuances of decorative grinding in my metal art course, The Art of Heat Colored Steel Engraving.
My online course covers every aspect of the process of making metal art pictures in steel using heat colors and grinding techniques.
Variations in rpm, hand speed, and hand pressure combine to broaden your metal grinding pattern palette even further.
When you master the inherent effect each has on an abrasive’s scratch pattern, you’ll be one step closer to intuitively choosing and using the best abrasive for the job.
I walk you through exploring these effects in Module 4, Lesson 2.
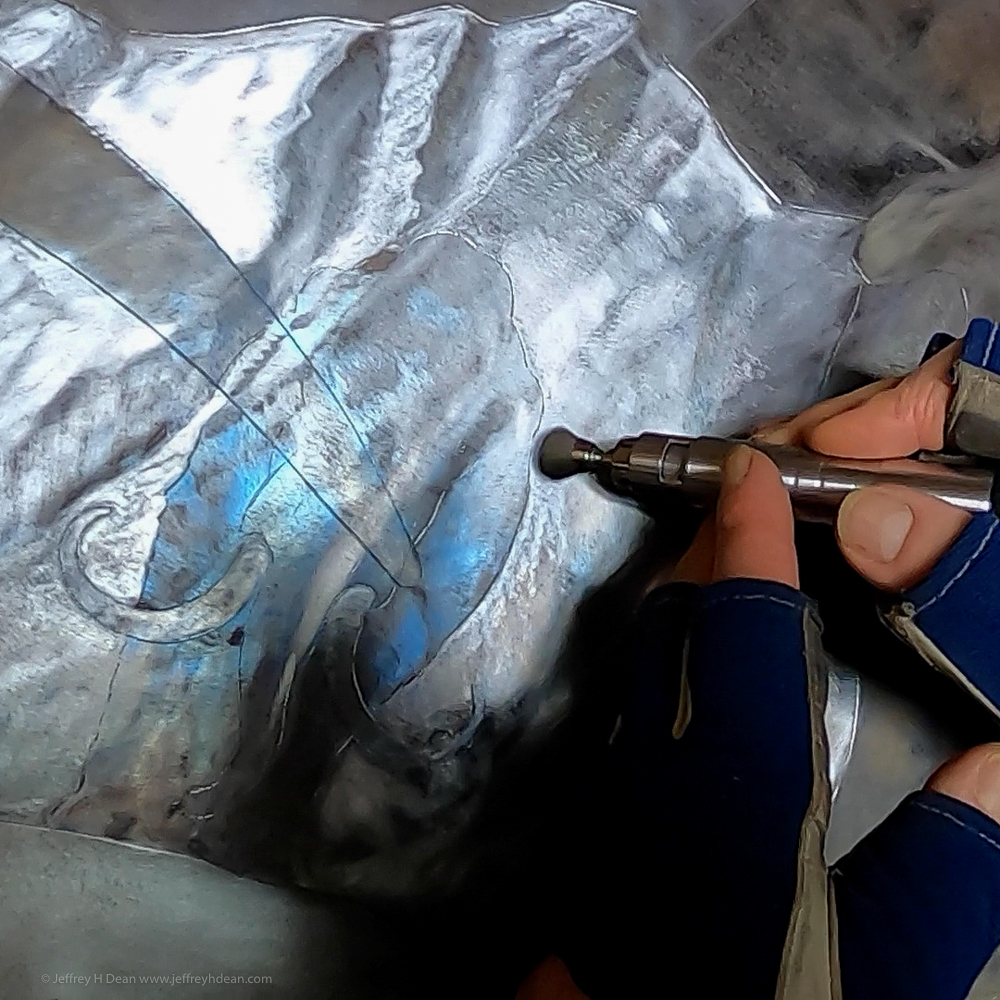
Decorative grinding, however spontaneous, requires a degree of precision.
You’ll need to develop an intuitive sense of the active grinding zone from the smallest detail to the broadest sweeping strokes.
Though there are exceptions, you cannot see through most abrasives and metal grinding wheels, so you must develop a means to know where you’re grinding.
When you go through my course, you’ll learn several strategies for developing this sixth sense.
One of the beauties of metal grinding is you can use the same tool you mark with as an eraser.
That said, it never hurts to experiment if you’re unsure about what tool or grind pattern best suits the current task.
And there’s no better place to experiment than on sheet steel scrap.
Taking the time to experiment with various abrasives, tools, and grinding methods will not only free you to grind on your art with confidence but will likely give you new resources to draw from on your next project.
And, if you’d like to further enrich your metal arts knowledge and practice and learn more about how to make decorative metal art, I’ve created a comprehensive online course to share what I’ve learned about heat coloring, decorative metal grinding, and all aspects of making heat-colored steel engravings.
I’ve dedicated an entire module in my Art of Heat Colored Steel Engraving course to decorative grinding and texturing steel.
Two years in the making, The Art of Heat Colored Steel Engraving course provides a wealth of metal arts and decorative grinding knowledge.
You will learn the fundamental skills of the craft, including:
So you can make heat-colored metal art in your distinct artistic style.
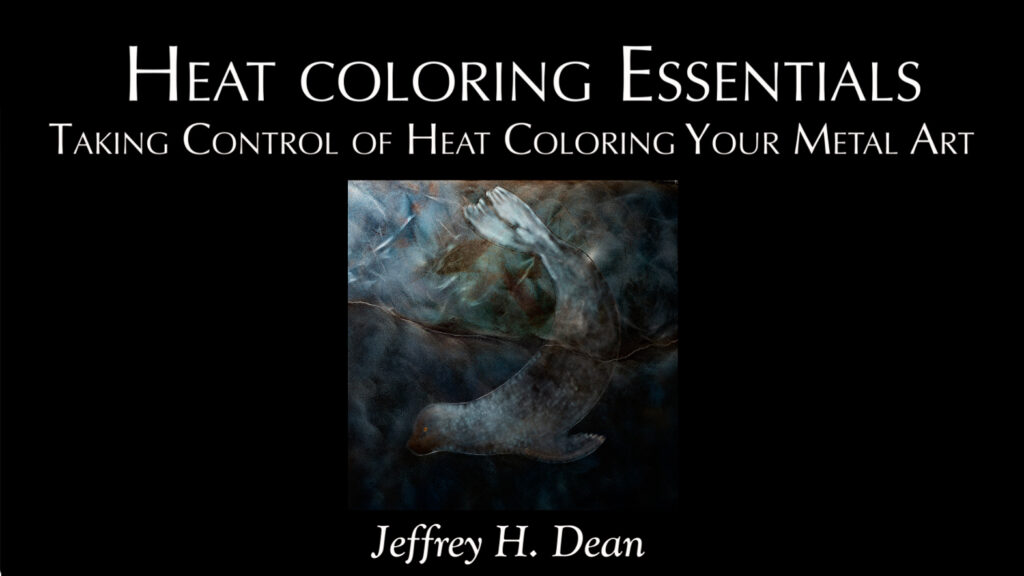
I also have a 90-minute~ online metal art workshop called Heat Coloring Steel Essentials – Taking Control of heat coloring your metal art.
I share exactly how to set up your workspace, choose the right torch, and get each color consistently. You’ll learn to get a light straw and dark green and all the colors in between. It’s just $47.
Learn more and purchase it here: Heat Coloring Steel Essentials – Taking Control of heat coloring your metal art.
You can combine marks made with more than one metal grinding wheel or another abrasive type to create more complex and sophisticated effects.
Here are a few of the reasons you may choose to do this:
1. To soften or blend a coarser texture.
2. To add contrast or highlights.
3. To add richness by layering marks having different characters.
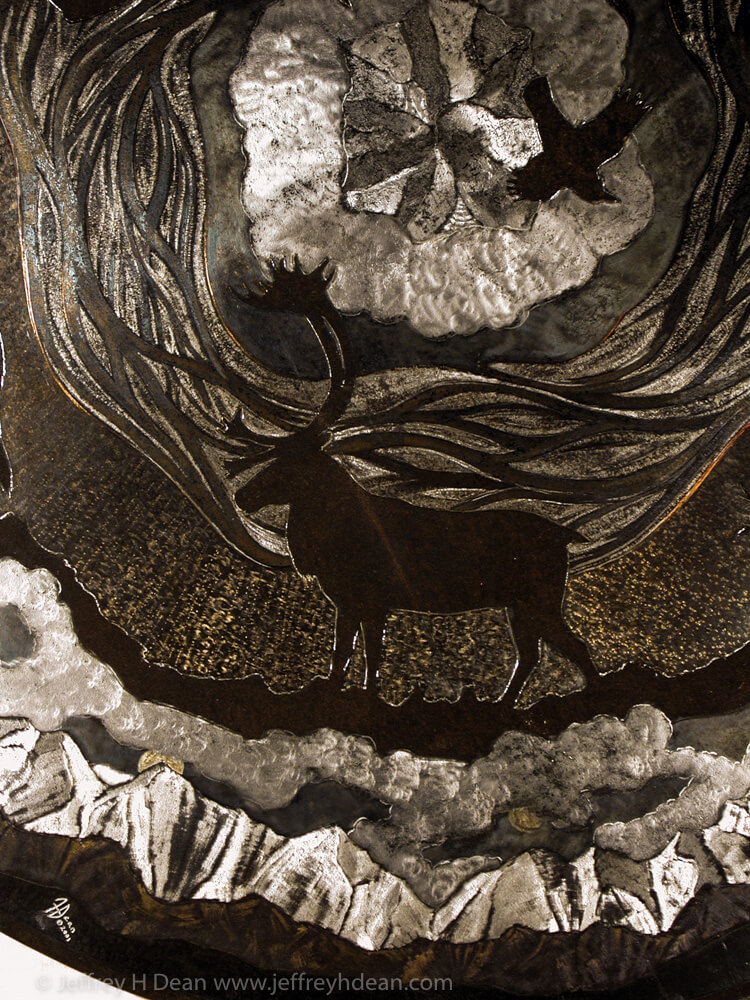
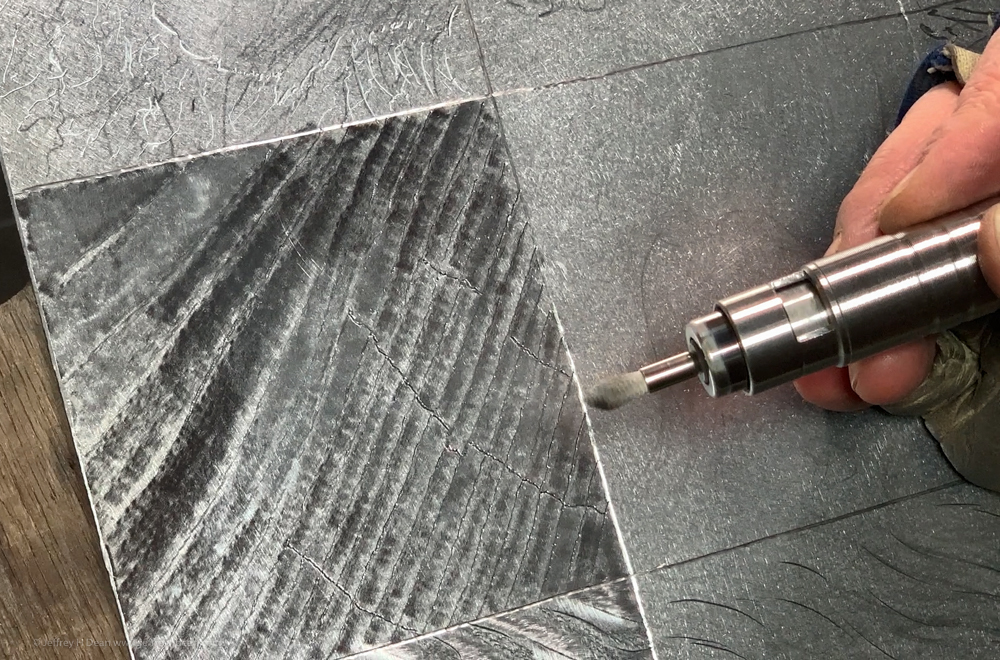
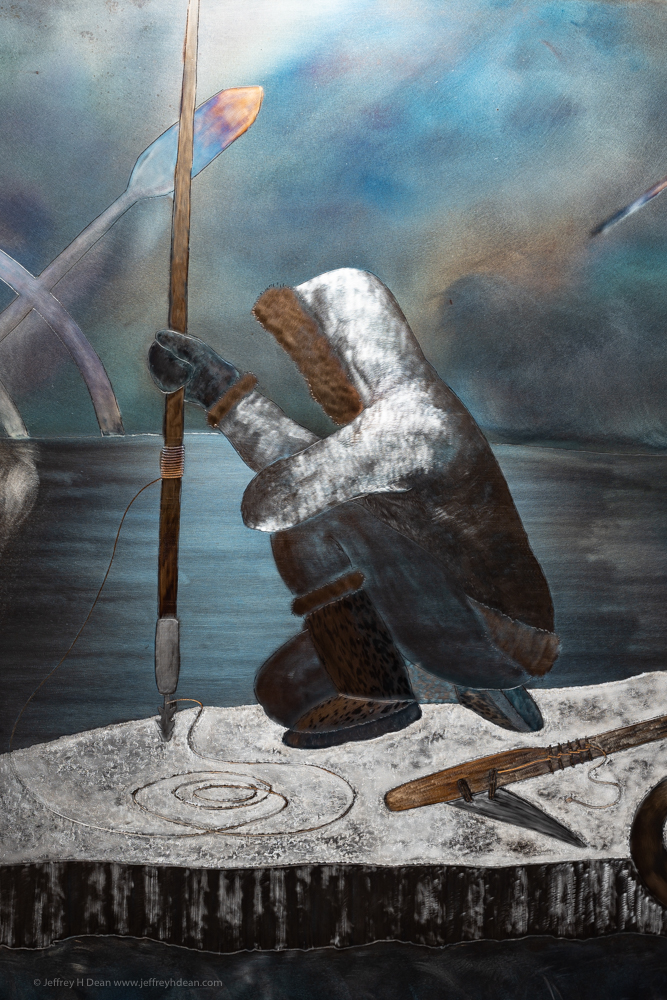
One of the beautiful things about heat-colored steel engraving is that you can create pictures in steel and suggest depth, form, movement, and material, all by barely scratching the surface.
You do this using carefully chosen abrasives and deliberate grinding patterns to create the desired effect.
Though all this magic happens on the very surface of the steel, I stumbled on this technique while attempting to grind a large steel sawmill blade in relief.
It wasn’t the brightest idea, but being a sculptor, it was the first thing that came to mind when my neighbor gave me a 52″ diameter saw blade.
Though I’m a pretty tenacious guy, I quickly gave up. Not only was the tool steel hard, but it would also require colossal labor to grind even mild steel into noticeable depth layers.
To make a long story short, I saw the temper colors run after unsuccessfully attempting to braze a layer of brass onto the surface. It was an aha moment as I realized I could make pictures using decorative grind patterns colored with heat from a torch.
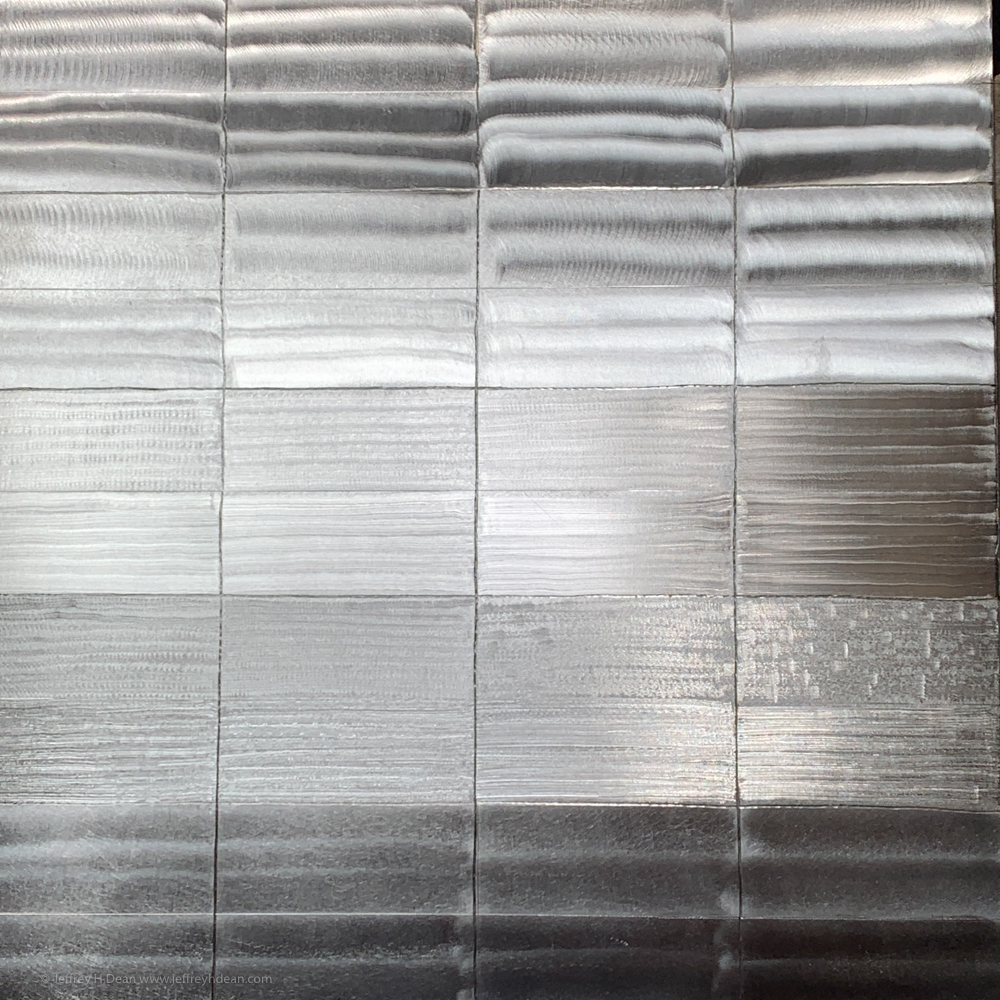
We’re all used to suggesting depth with our drawing, but with heat-colored steel engraving, you can also do this using deliberate grinding patterns.
And so, in contrast to modeling in relief or grinding the steel into different levels, within the barely discernable depth of the surface, you can create an effect of great depth in a sheet of steel.
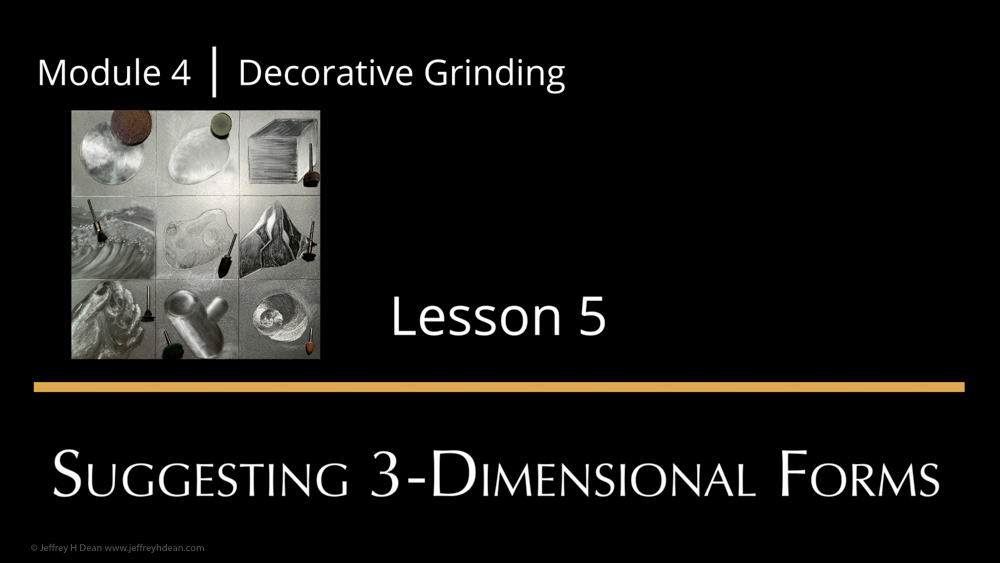
Module 4, Lessons 5, and 6 are dedicated to suggesting three-dimensional form and depth using surface texture.
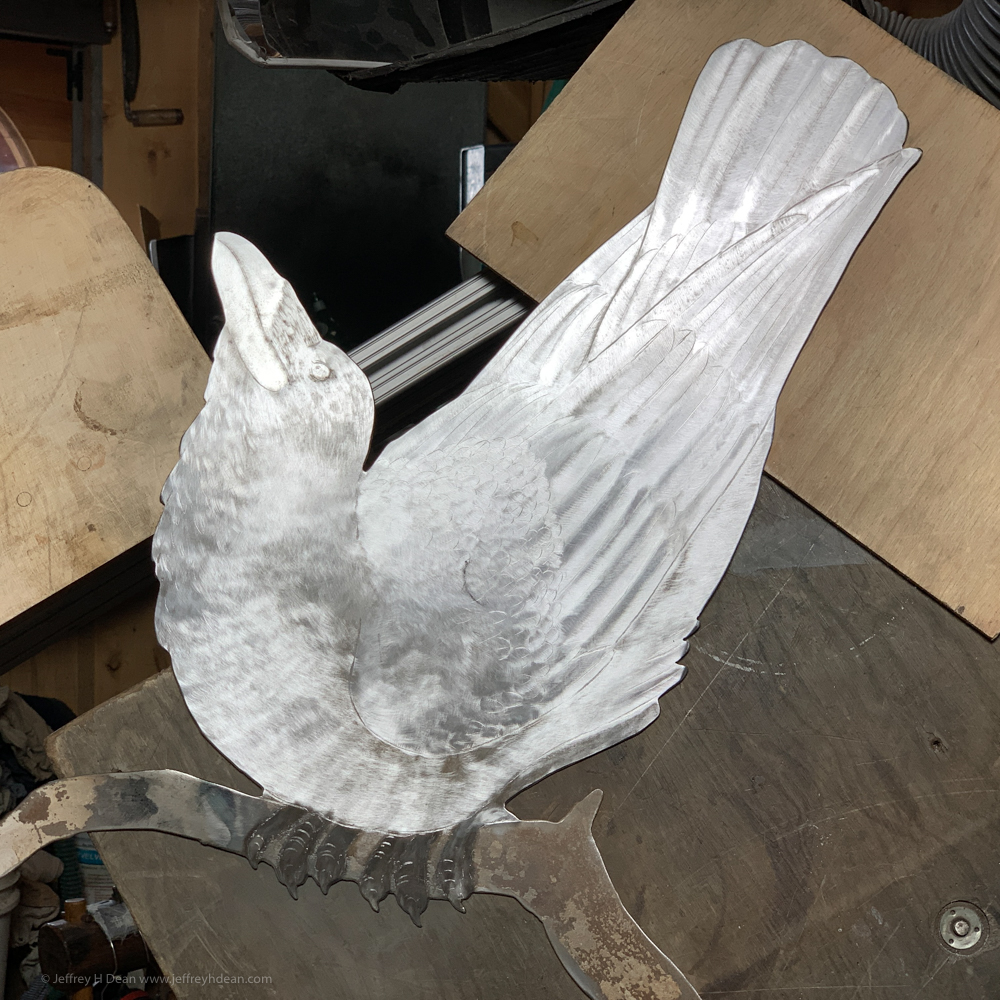
Just as there are an infinite variety of textures in nature, so can there be in your artwork.
When you are grinding designs into steel, you’ll need to consider what surface texture will convey the feeling you are after in each area of your artwork and choose the abrasives and texture or grind pattern accordingly.
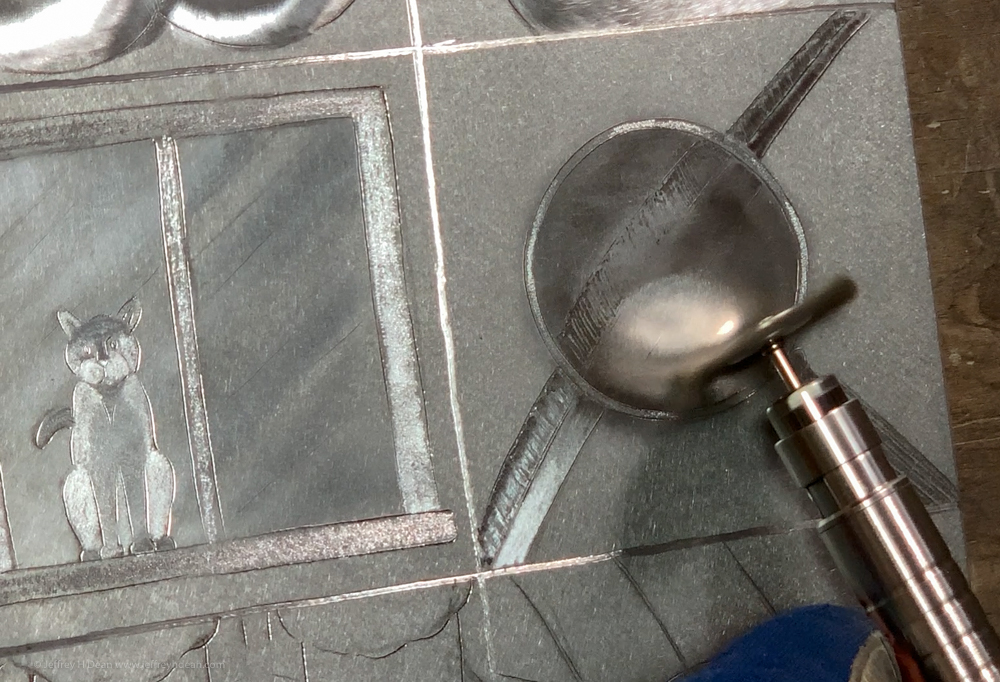
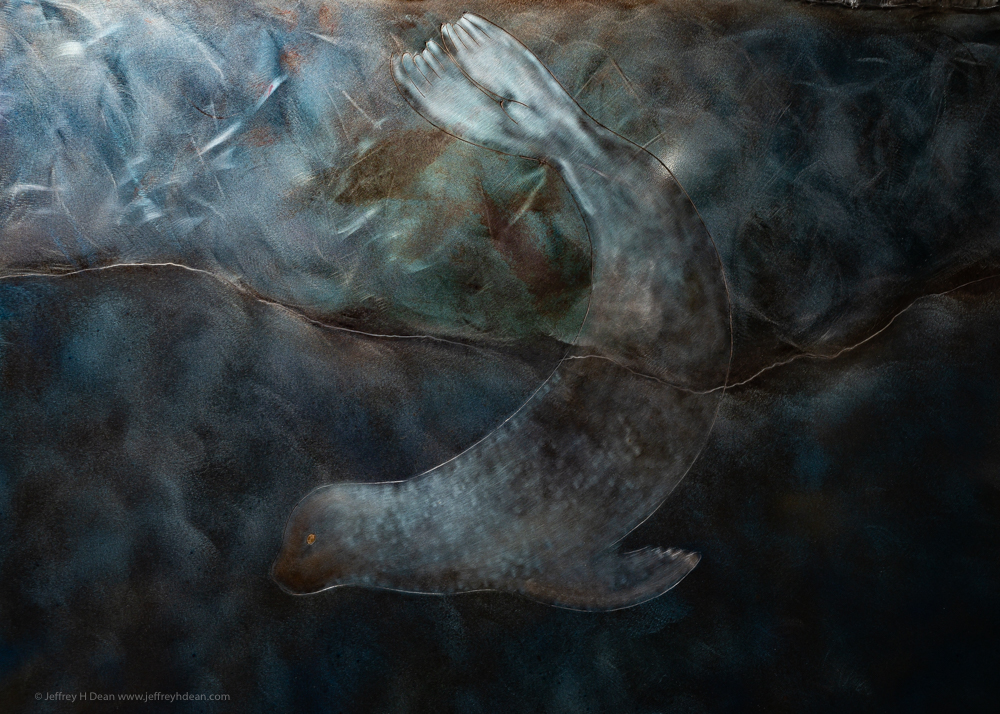
Some abrasives lend themselves more than others to suggesting a sense of transparency.
After drawing objects in front of or behind each other, you can use grinding effects to reinforce the transparent effect you’ve created.
The size of abrasive or metal grinding disc you use for decorative metal grinding often changes relative to the scale of the artwork. For example, you can make decorative grind patterns on a large surface using a small abrasive, but it all comes down to whether the texture you make suits the subject’s character.
In the end, you may use the same abrasive style and grinding pattern but scale its diameter to match the size of the work.
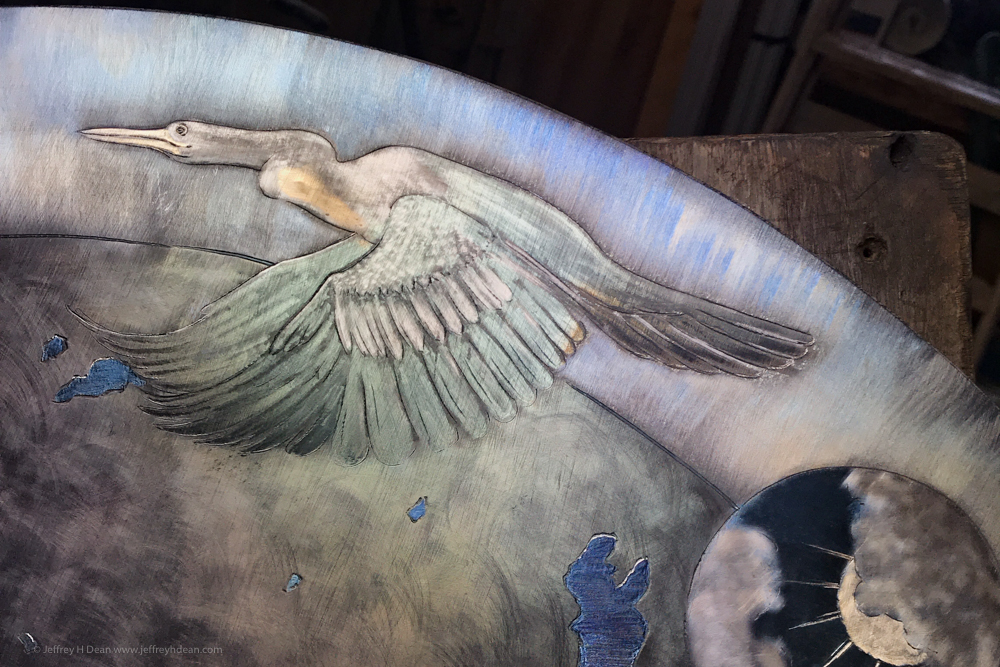
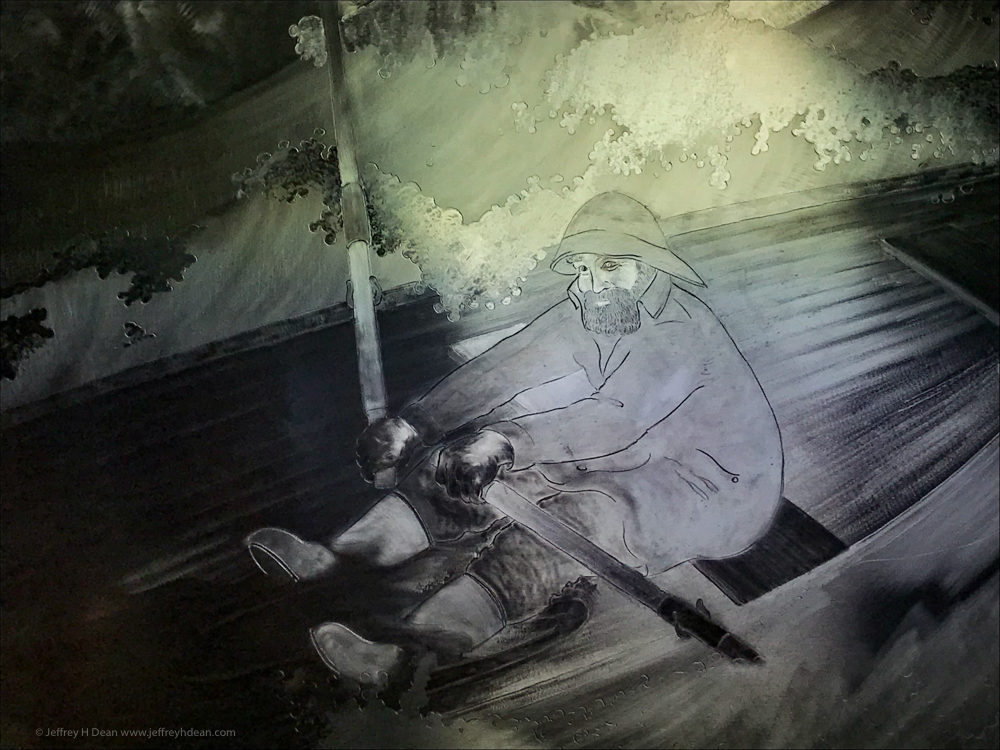
As artists, we convey movement in numerous ways.
Aside from drawing our subject in an active pose, we can use effects such as blur, tonal gradient, composition, and brush strokes.
Or, in the case of decorative metalwork, the marks we make with abrasives.
The feeling you intend to convey will dictate the feeling you have as you work, and in turn, how you wield your tool.
We can use our grinding tools with broad sweeping strokes to make dynamic, abstract grind patterns that convey both movement and depth.
Or use smaller marks as an impressionist painter might to create a directional visual flow.
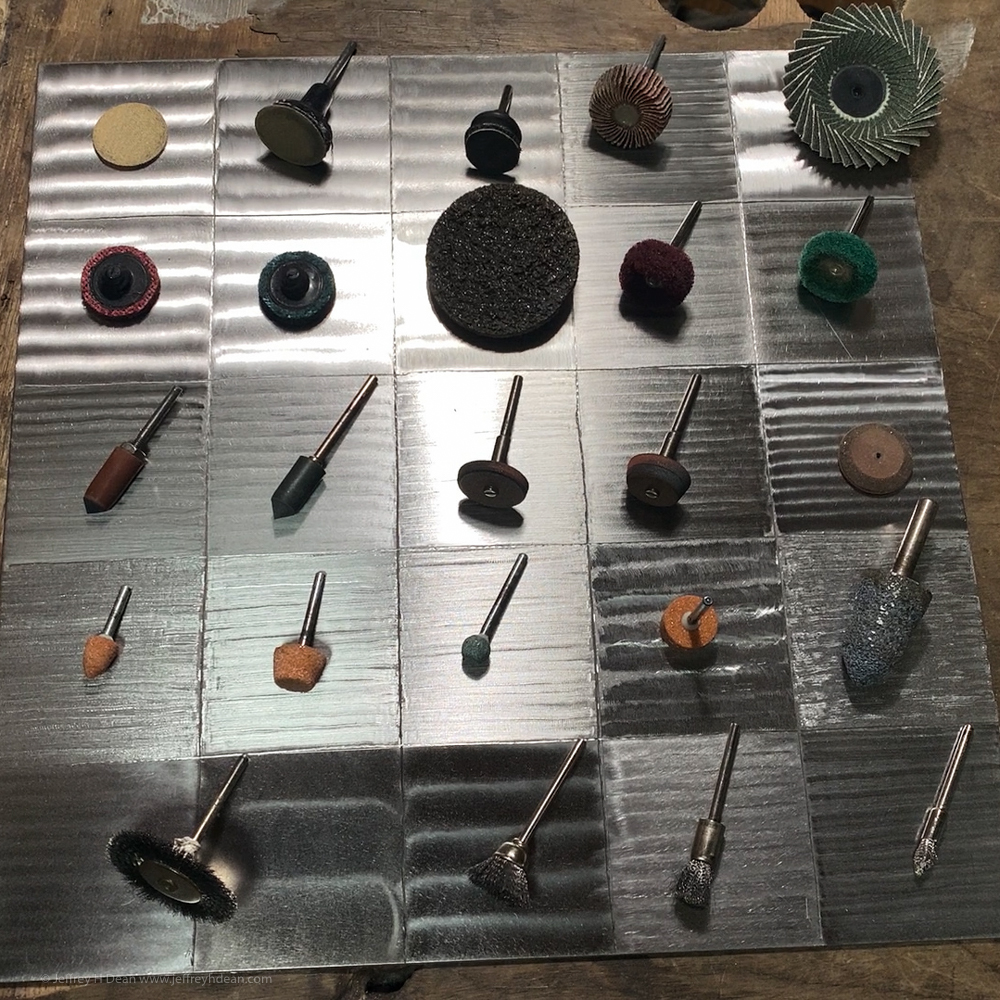
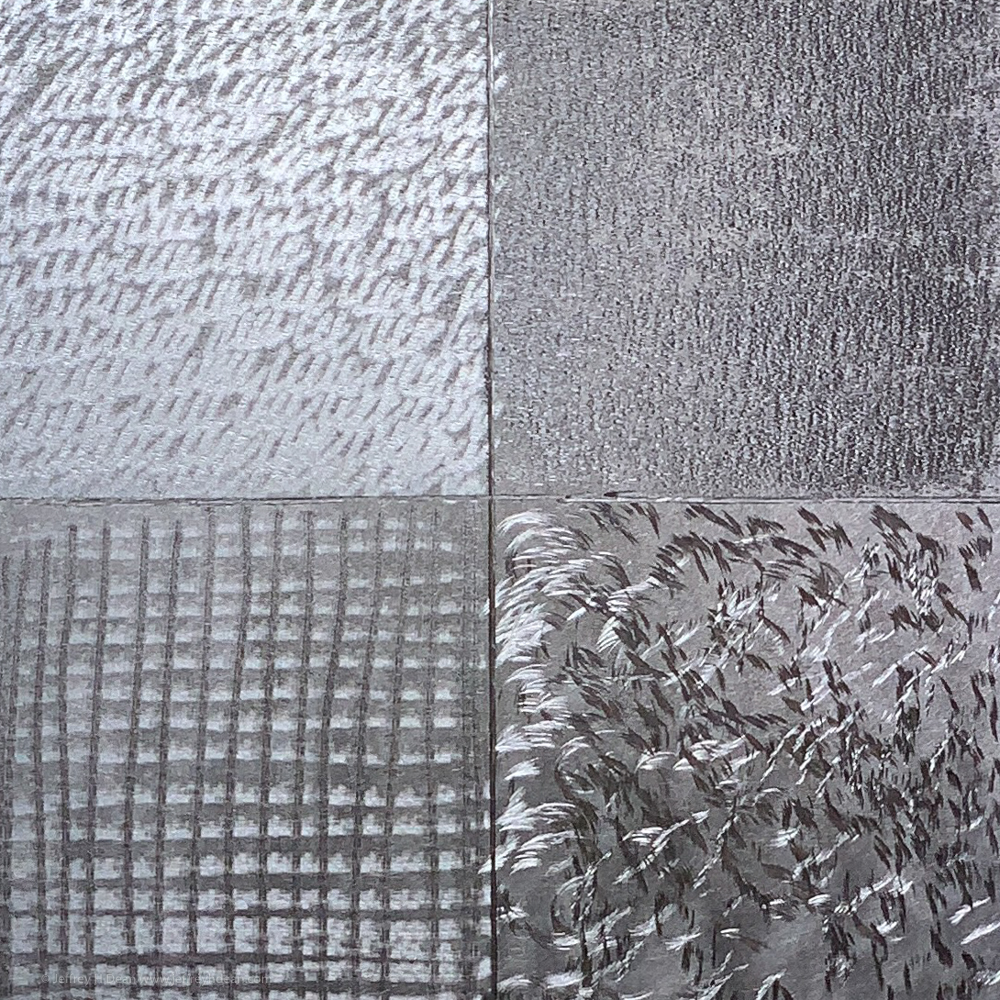
When it comes to texturing steel, there are few limits. And whether the intended surface is rough or smooth, bright or dull, there are many ways to achieve it.
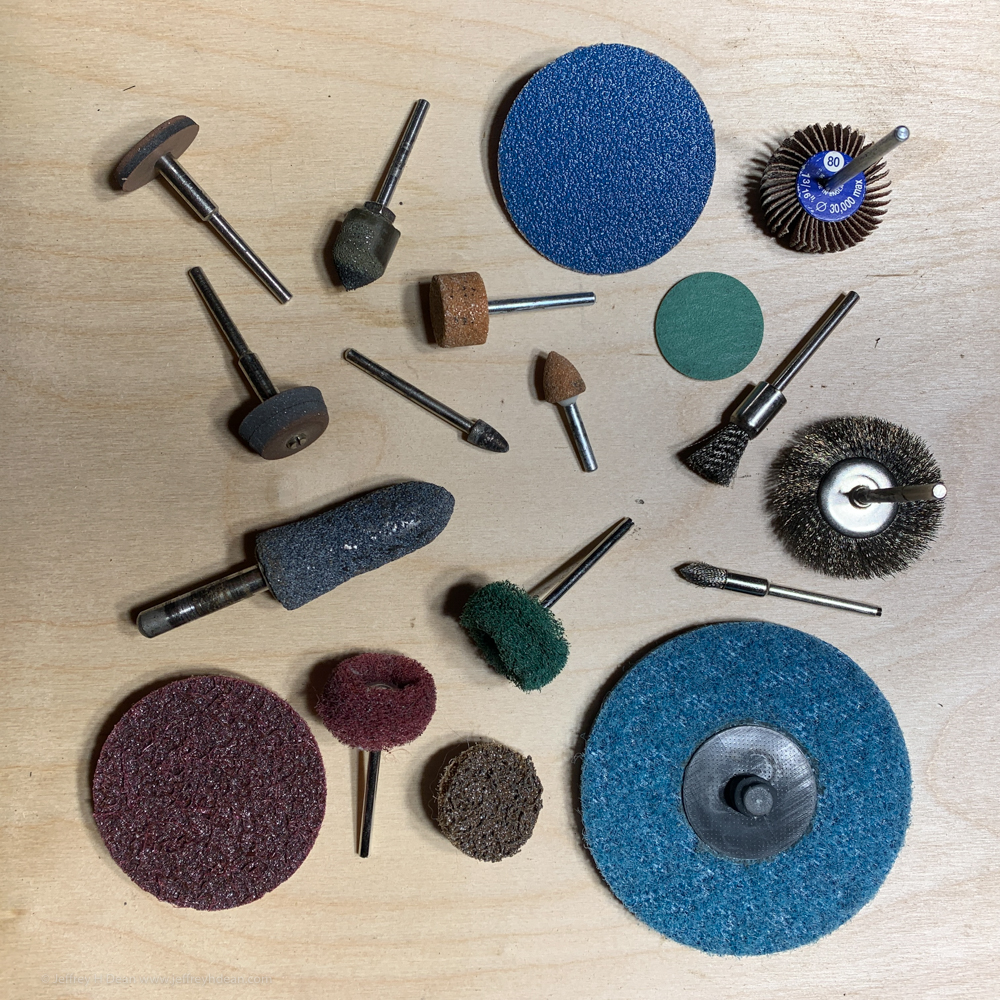
Though I use a myriad of abrasives in my work, for the most part, they fall into five main types.
I’ll use discs, bobs, wheels, and points of many sizes and configurations, all from within these groups.
There are obvious ways to use them for mark-making, and each has a typical scratch pattern.
But, as you’ll find when you go through my course, there are innumerable not-so-obvious ways as well. And the more of these you discover, develop, and implement in your work, the more captivating it will be.
Leaving the viewer to wonder, ‘How’d you do that?’
The marks you make with a grinder accentuate metal’s natural reflective qualities. As a result, light strikes its surface and deflects off the scratches you’ve made.
Their orientation determines the character of the reflected light, whether it appears dark or light or somewhere in between.
The effect is far from static. As you move or as the light source changes, the metal’s dynamic character unfolds to reveal yet another version of what may have seemed a familiar artwork.
And so, there is never a dull moment. Instead, you see it with a fresh perspective, one that changes with the time of day, the changing weather, or a flip of a switch.
If you’re interested in learning more about heat coloring steel and how to grind metal to help your art stand out, I’ve dedicated an entire module in my Art of Heat Colored Steel Engraving online course to decorative grinding and texturing steel.
When you’ve completed the lessons in Module 4, you’ll have a clear sense of what you can achieve with any given abrasive or combination of abrasives.
And, as you begin to make your artwork, you’ll realize you’ve only begun to tap the surface of your innovation – and the infinite variety of effects you can create with the metal grinding tools you have at hand.
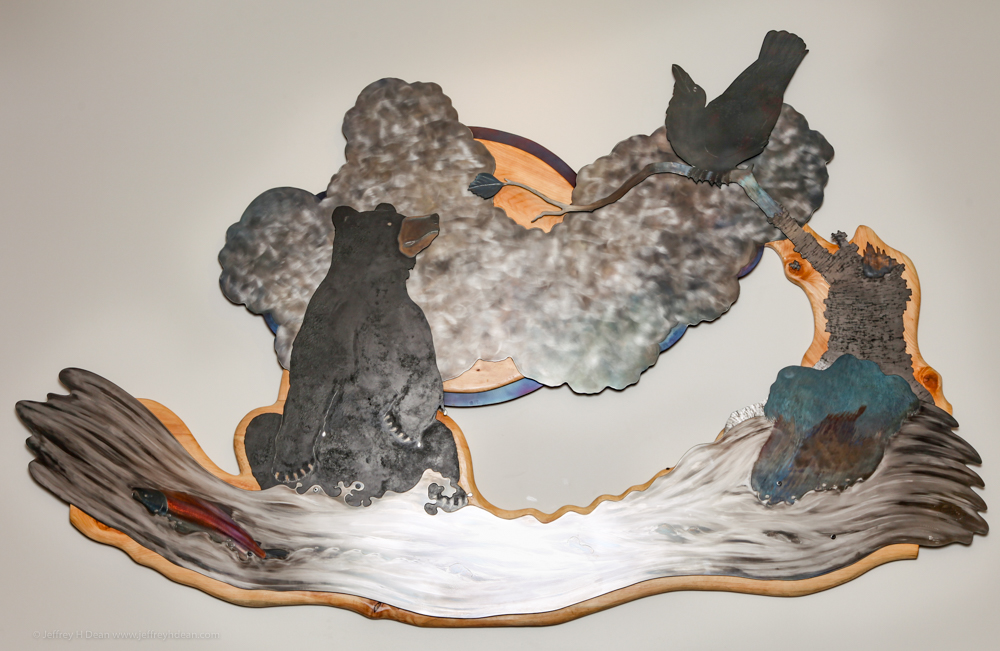
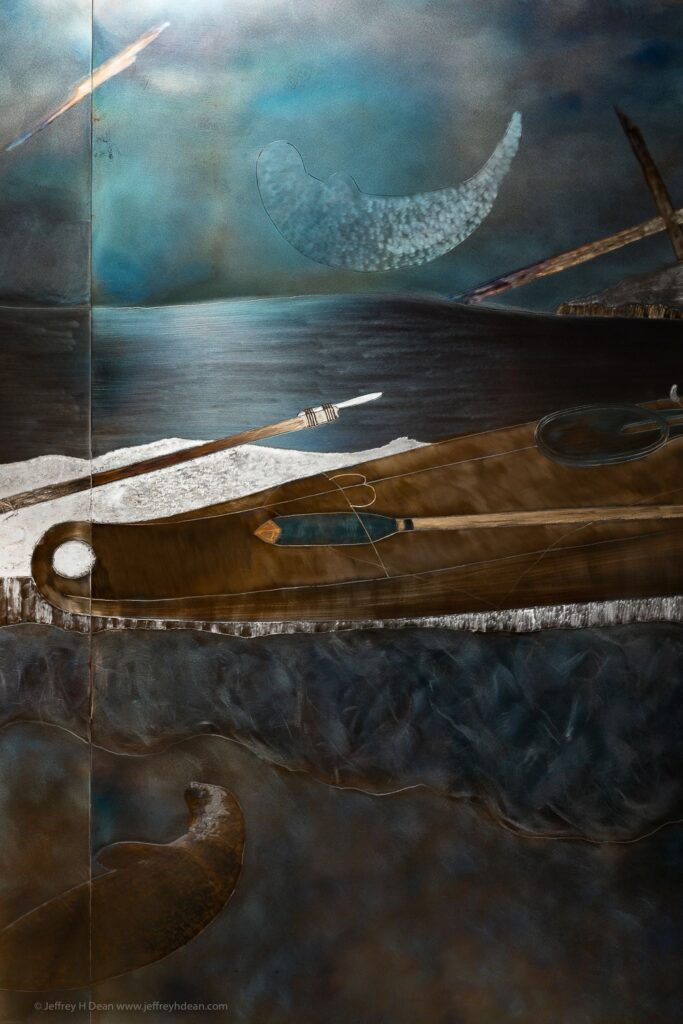
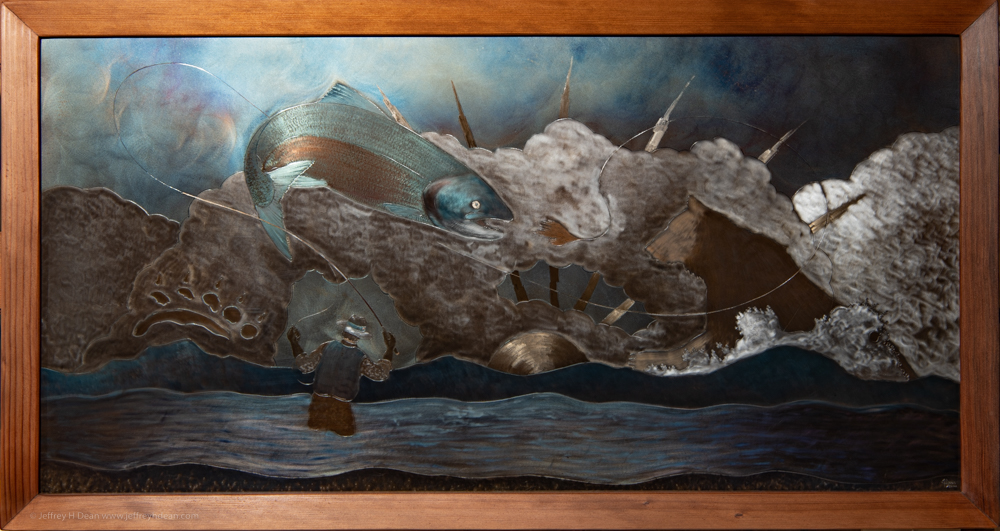
This 9′ wide large heat-colored steel engraving is an example of layered wood and metal wall art I made as a public art commission for the new library in Willow, Alaska.
You can see the metal wall art I have for sale in my online gallery.

Enter your details below to save your cart for later. And be sure to get in touch with questions.
Learn more about my Heat Coloring Workshop and Art of Heat Colored Steel Engraving course